Maybe this is a solution in search of a problem, but there are use cases. On occasion I will be down stairs in my Tech Center rocking out on some Ham Radio DX or writing some code for a Raspberry Pi and oblivious to the world. Those are usually the times when my wife Tammy is trying to get ahold of me, but is worried about interrupting me.
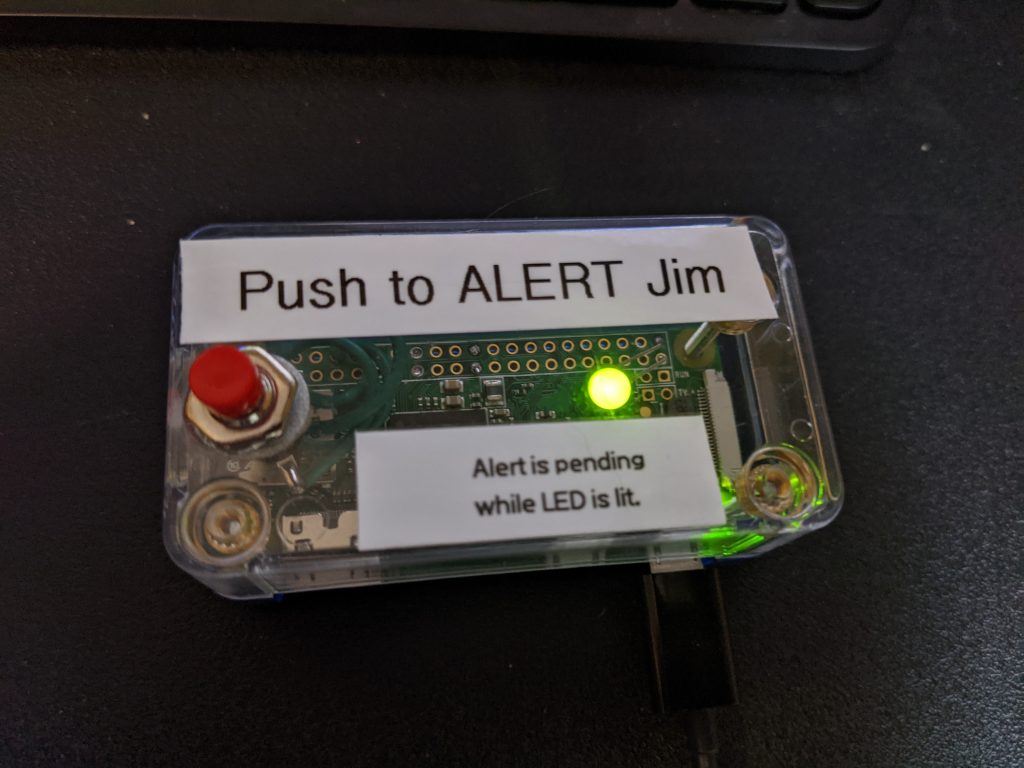
Introducing the Jim Alert system. It starts with the button on this Raspberry Pi Zero.
Tammy pushes the button which writes a file to a server which trips the LED on the Pi. This allows her to know the alert has been triggered.
Once every minute (for now) my flip dot clock will check for that file. If it finds it, it will trigger a custom message on the clock and an alert sound. (Literally, ALERT in Morse Code). Here’s what it looks like…
Once the alert displays, the LED on the Pi Zero goes off and it clears from the Flip Dot in about 30 seconds, at the top of the next minute.
A possible future enhancement might be to add multiple Pi’s and show the room the alert came from.
Lots of stories about how Amazon is activating their Sidewalk network this week. I think that will really benefit people, here’s why.
It’s Open Source.
It’s not just a network for Amazon, it is a network for IOT devices. Several non-Amazon companies like Tile will have the same access to the same network.
It’s Double Encrypted
Both individual packets and the connection are encrypted. So even if the security of the network is breached, the data is still locked.
It’s not proprietary data.
This data is going to be anonymous, there is no PII data in the packet. Just something saying “I’m here” or “No Mail Yet.”
It’s not for web surfing.
The maximum amount of bandwidth used is low, and there are caps on how much is used per month. It is not going to slow you down and it is not going to eat up your bandwidth cap.
It’s way more efficient than Cellular
The low power aspect to this is very appealing. To use trackers with Wifi or Cellular would suck down your batteries. Think of being able to out solar power weather stations all over the neighborhood
You are probably already doing this.
Have an iPhone? It is probably sending tracker data back from air tags via your connection.
It’s more bandwidth efficient.
Sending data over the cellular network is expensive on a cost per bit basis. Your home internet connection is a fraction of that. Having this data go on the home network frees cell data for other things that may be more important to you.
No apologies for Amazon on how they are rolling this out. An opt-out option is challenging to make people aware of. An opt-in model lacks scale. These are the types of things a network manager needs to take into consideration.
So, for bandwidth efficiency, broad scale and robust security of low fidelity telemetry type data, I feel this network benefits way beyond the stumble Amazon has had with it’s launch
I wrote in a previous blog post that non-professional space travelers (space tourists) should have a term other than “Astronaut.” This AP article takes on the topic.
The dividing line for me seems to be, “are you going to work for a public or private space agency.” If yes, Astronaut, if no, Astrotaxedia is my preferred term.
Examples: Bill Nelson current NASA admin and former shuttle rider, Astrotaxedia
Inspiration 4 crew Astrotaxedia
Pilot of Virgin Galactic Spaceplane Astronaut
Passenger on Virgin Galactic Spaceplane Astrotaxedia
With several new commerical space trips coming on the agenda, particularly the SpaceX Inspiration 4 and the new Virgin Galactic “Spaceship 3”, I’d like to discuss the use of the word “Astronaut” (and I guess “Cosmonaut”) would fit too.
Wikipedia defines Astronaut as :
An astronaut (from the Greek “astron” (ἄστρον), meaning “star”, and “nautes” (ναύτης), meaning “sailor”) is a person trained, equipped, and deployed by a human spaceflight program to serve as a commander or crew member aboard a spacecraft.
I’m glad that people are getting to live their dreams of going to the stars. However I think it’s time we distinguish someone who paid for their seat or are a “space tourist” with someone like Neil Armstrong, Buzz Aldrin or Chris Hadfield who make their careers going into space. So, to differientiate I propose the following:
An astrotaxida (from the Greek “astron” (ἄστρον), meaning “star”, and “taxida” (ταξίδια), meaning “wanderer”) is a non-crew person traveling via a human spaceflight program.
I’m not trying to diminish anyone who goes to space, but I do think we should have unique terms for those who work among the stars. We distinguish between airplane pilots and airplane passengers. Let’s move that distinction to the space realm.
I would love to hear your thoughts, find me on Twitter at @n4bfr or Reddit at /u/N4BFR.
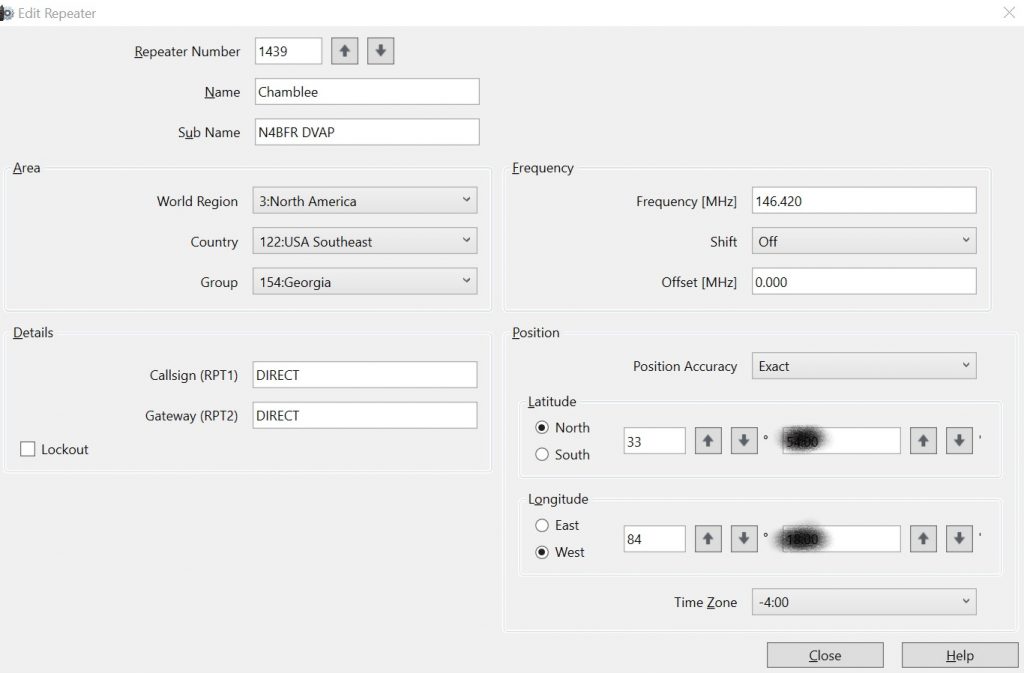
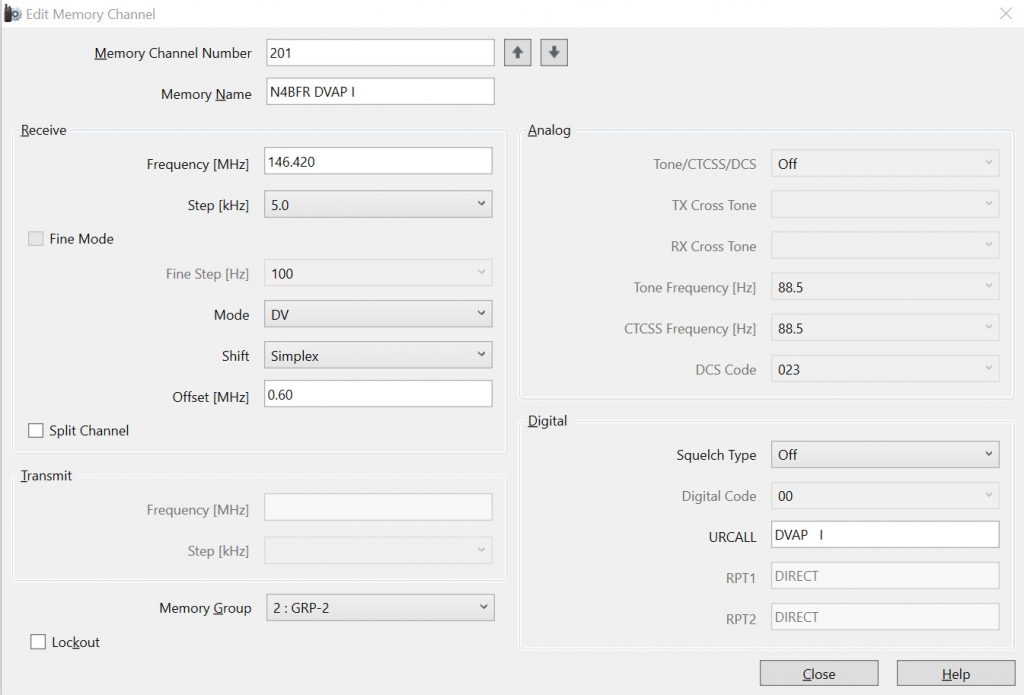
I wanted to see if I could add my DVAP Dongle hotspot to the DR list of repeaters on my Kenwood TH-D74A handheld. I could find the settings for an ICOM radio but not a Kenwood so I did a little experimenting. Here’s what worked for me:
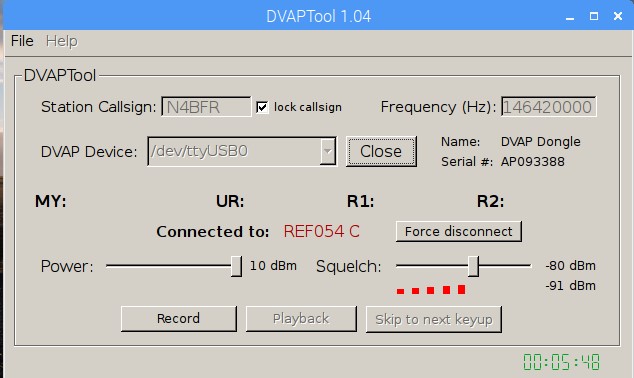
Part of the trick was using the DIRECT tag in RPT1 and RPT2. This allows me to link and unlink repeaters using the DR mode, tested on 30C and it came right through. This works with DVAP Tool V1.04 that I am running on my Raspberry Pi.
The only functionality that doesn’t seem to work is INFO and ECHO since the DVAP is looking for “DVAP I” vs. just the “I” command and “DVAP E” versus “E”. To keep that functionality, I put it in as a repeater memory.
Now I have DVAP access both ways, memory channel or DR mode. Hope this helps someone figure it out.
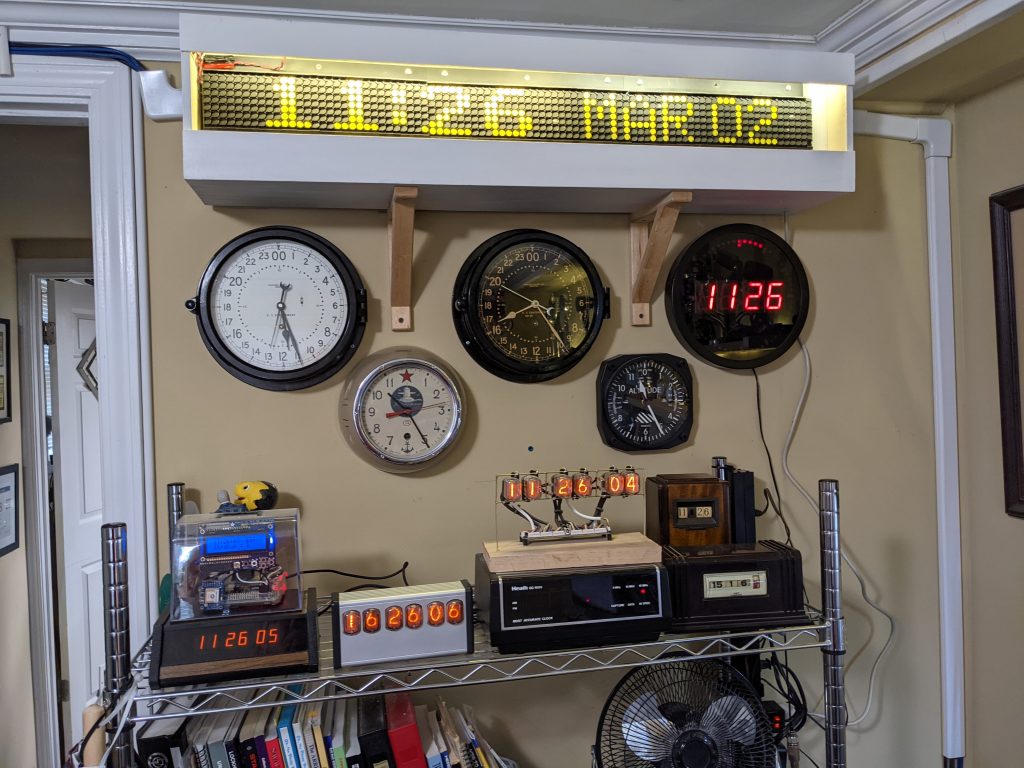
It’s a nice confluence of my fandoms, I love old technology, I love clocks and I love Raspberry Pi’s, so when I found a Luminator 7×90 Flip Dot display on eBay in early January, I bought it. This is the fairly-detailed, well illustrated story of how I brought a 90’s sign together with a low cost but powerful computer.
Once I started walking for exercise, it’s difficult to stop. I decided after 100 consecutive days of walking mostly around the neighborhood, I needed an adventure. So I set off for the North Georgia Mountains to find the southern end of the Appalachian Trail.
For the photos from the video and others not shown, please enjoy my Google Album.
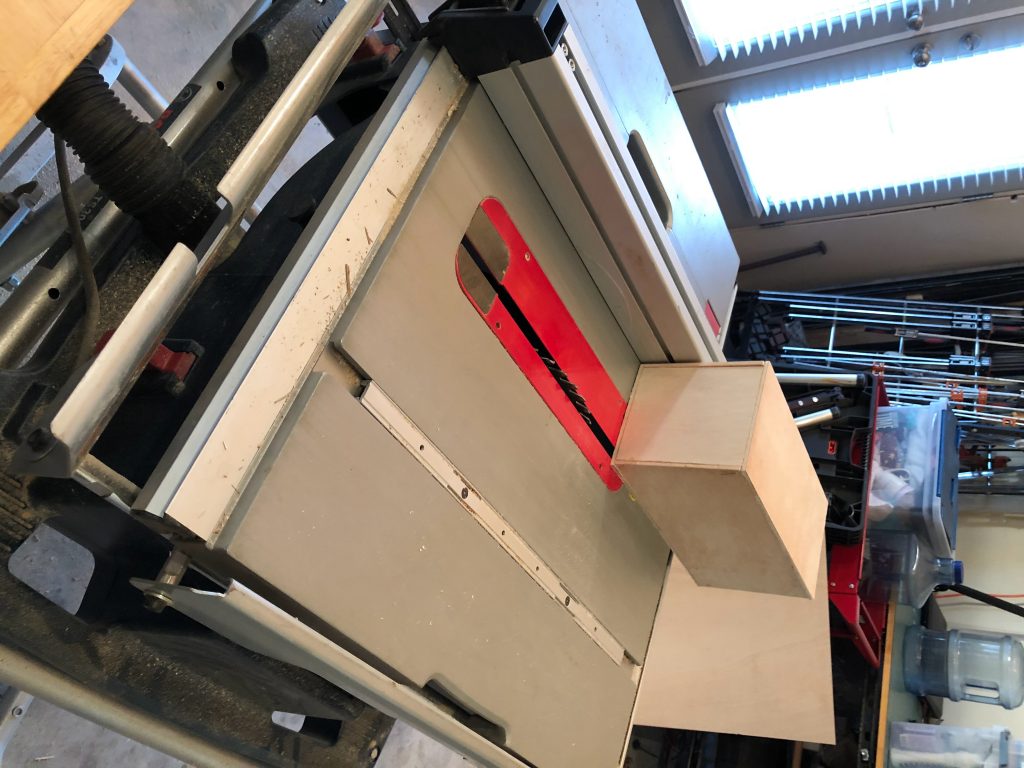
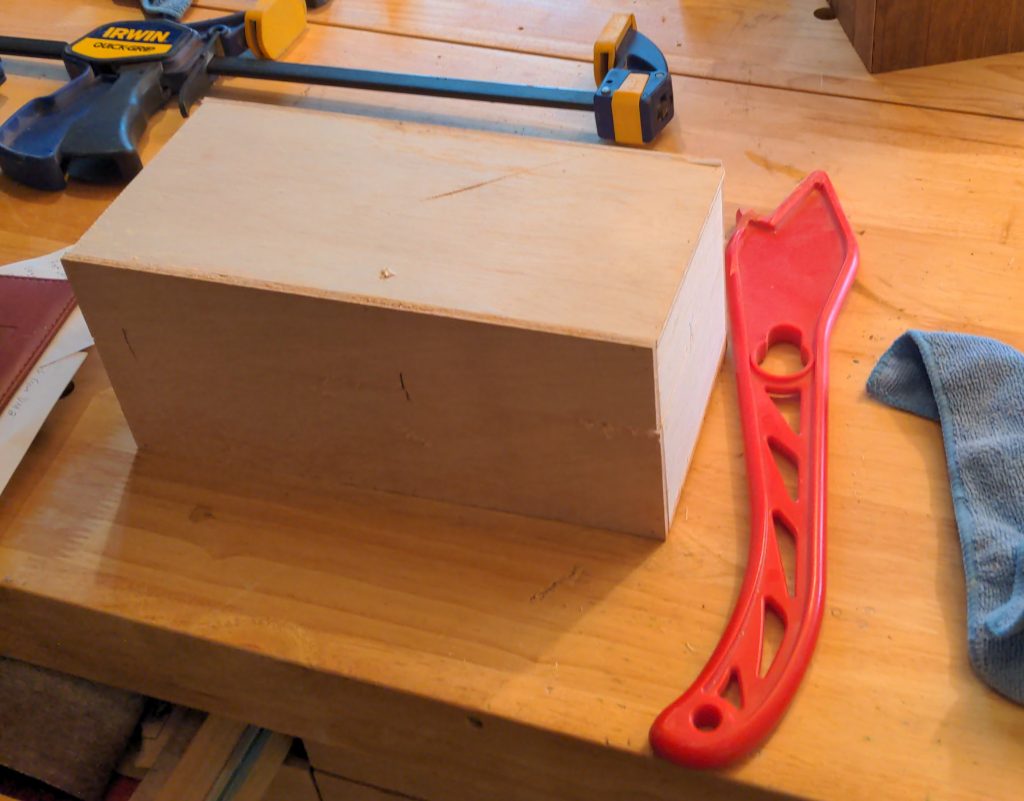
A lot of times the background noise in my shack while I work on code projects or just putter around is Adam Savage’s Tested on YouTube. Yes, the MythBusters maker known for blowing stuff up puts on a great channel of builds and tips. Last week he did something called a “Real Time Box Build” and I said, “I can do that, and I have just the project for it. So, I present my box build in pictures.
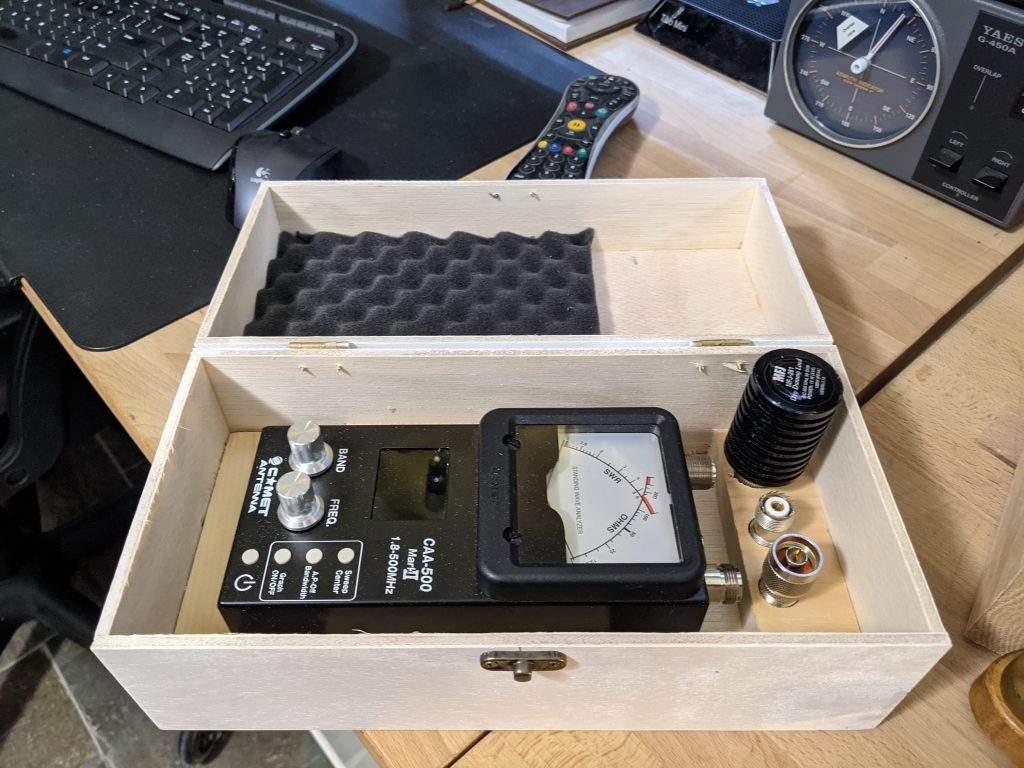
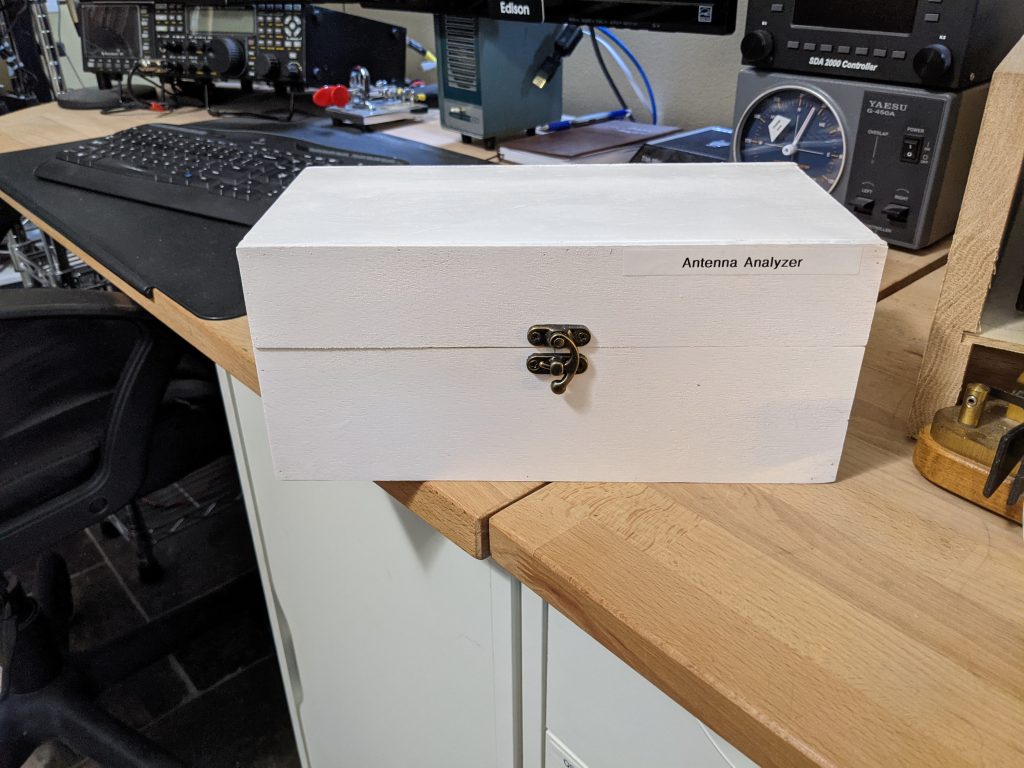
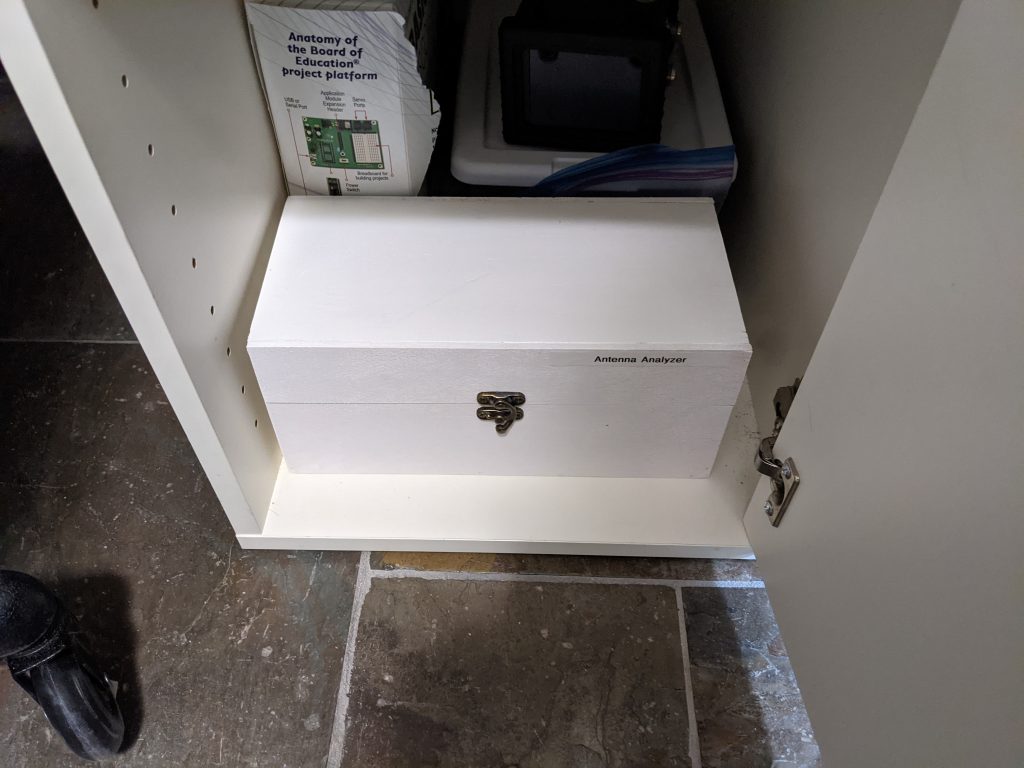
The Antenna Analyzer box protects my Comet CA-500 meter much better than the original cardboard box I had been dragging it around in. It also gives me some quick access to the three accessories I use the most with it. Those are a dummy load, a N to PL-239 adapter and a barrel connector.
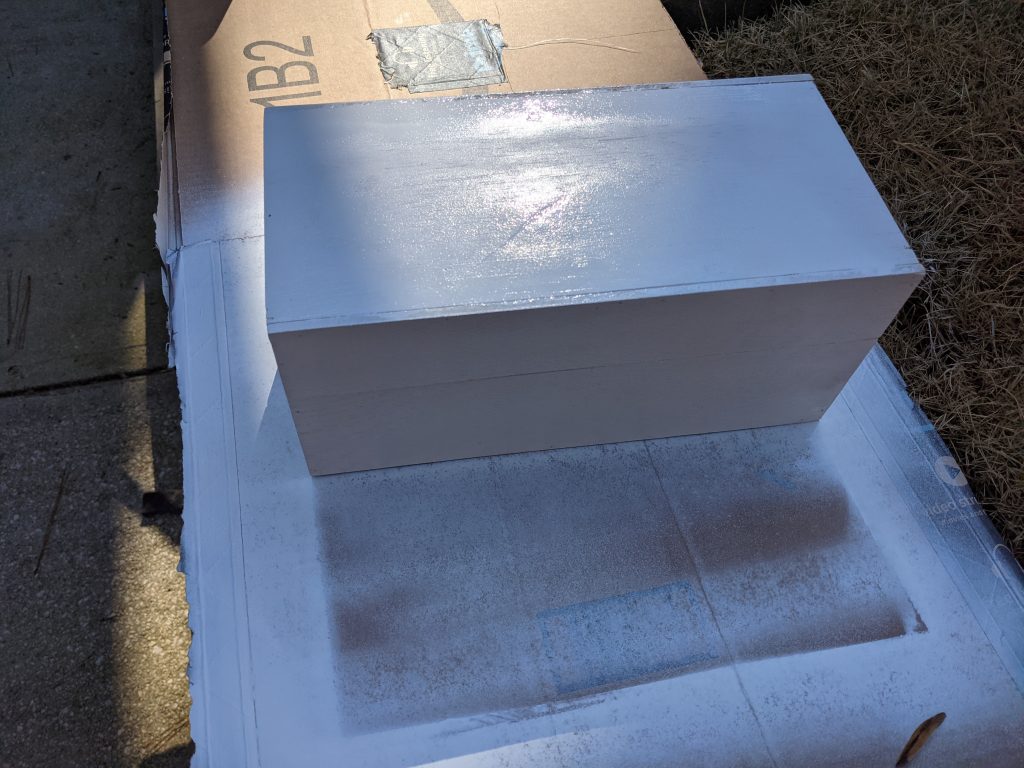
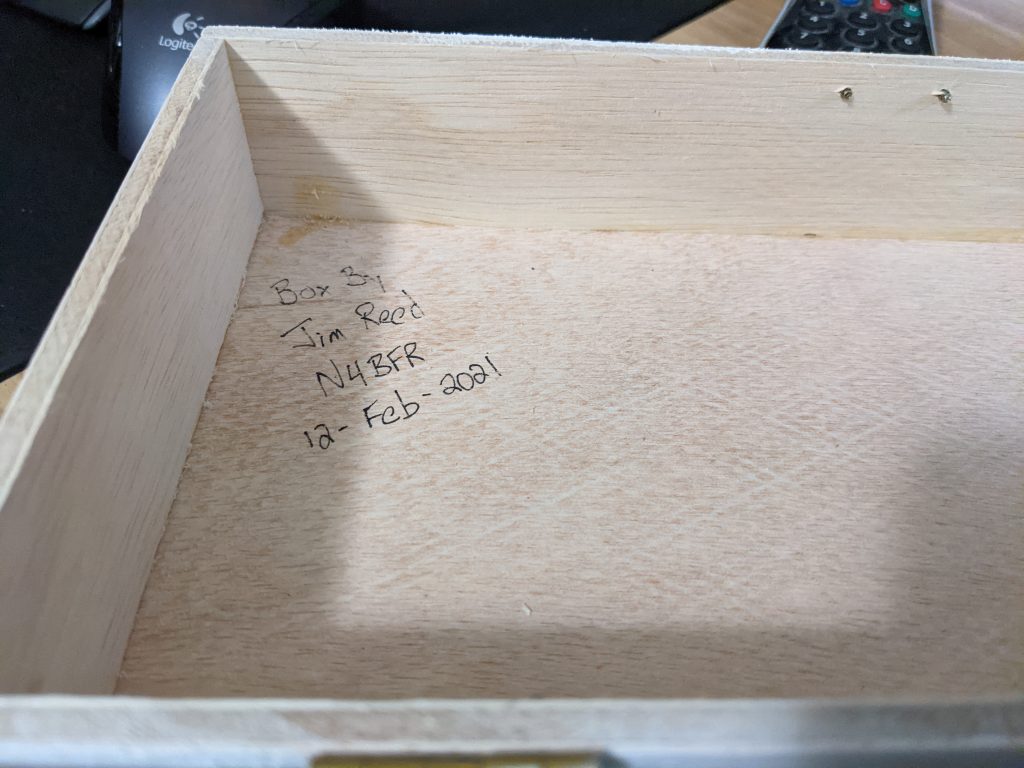
I know Adam usually doesn’t do finishing on his storage boxes but I had just a little bit of white spray paint left from another project, so I hit the outside with a bit. I also added the necessary label (my goal is to have more labels than the Bat Cave at some point) and I signed it on the inside.
Big thanks to Mr. Savage for his easy to understand tips. I particularly like the concept of “build the box, then cut it open” versus building two halves. I also found his tip on using a pin-nailer for assembly very helpful so I invested in a Ryobi that works very well and doesn’t need a compressor.
I also need to give a huge shout out to my friend Karen who let me user her basement wood shop. I have done some woodwork at Decatur Makers, and will do so again, but this allowed me a little extra social distancing which was a relief for me.
As you might guess by the headline, this is the first of several projects for me. Part 2 will be a yarn box my wife requested to keep our kittens out of her skeins. Part 3 is a large frame for my Flip Dot Sign project. So check back for more.
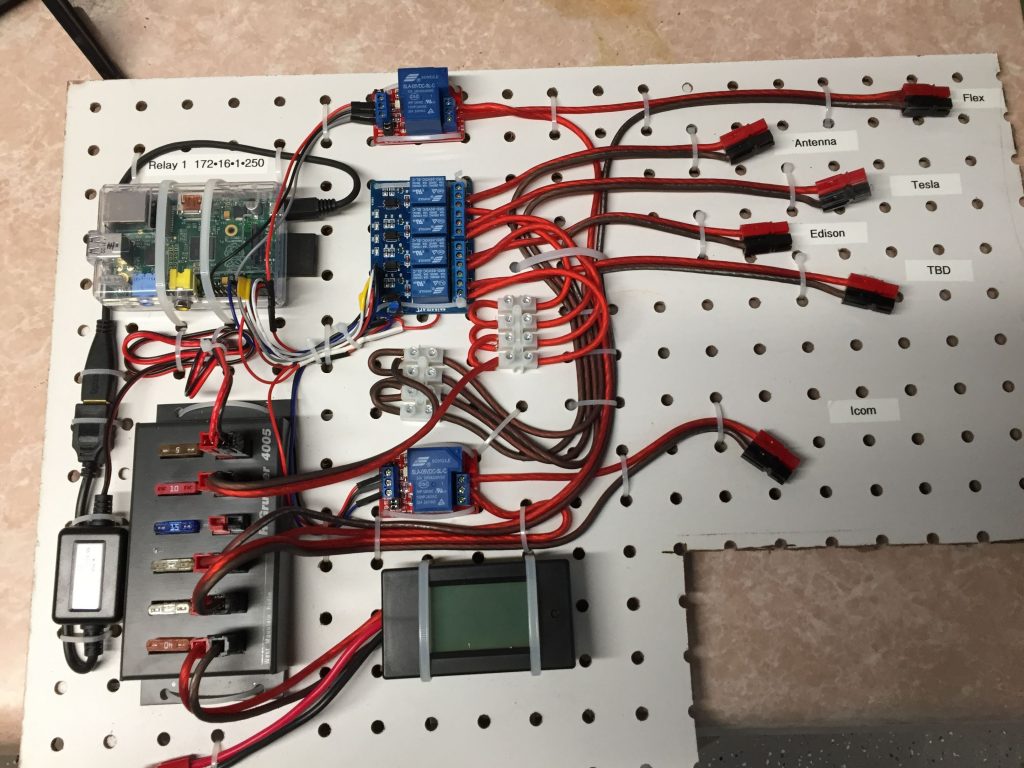
As one of my earlier projects, I set up a Raspberry Pi with some relays to control my systems remotely. This allows me to warm things up from the couch before I head to the shack, or if COVID ever goes away, to fire up the radio remotely.
2016 photo of the relay panel.
So it’s been several years since I made any updates to the Raspberry Pi that makes all that work. I remember rolling back from a Raspbian update because it broke some functionality and I wasn’t in a place to spend time on it. I finally found the time this week, 3 YEARS later.
As I write this it is January 15, 2021
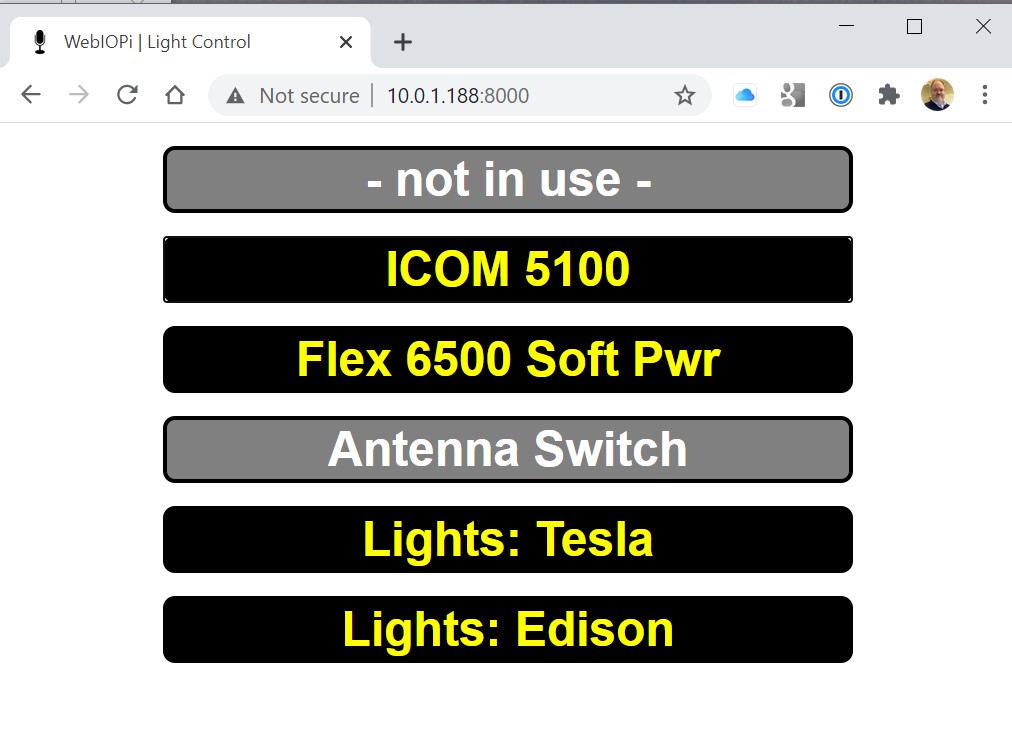
So I decided to start from the ground up with the latest version of Raspbian and reinstall WebIOPi, which is the software I am using. WebIOPi allows me to use the GPIO pins to control the relays using a web interface. I had spent a little time customizing it for my shack so I wanted to keep using it. Unfortunately it hasn’t been updated in 4 years.
My quick GUI for controlling lights and radios.
After struggling with the latest version of WebIOPi (0.7) and dealing with “invalid syntax in thread.py” and “Attribute error” issues related to my Pi 2B, I found my savior on GitHub. https://github.com/doublebind/raspi
Follow the instructions theree and you are good to go. I’ll be pleased if it will run another 3 years with no need for updates.
Last winter, early post retirement, I was tinkering around with one of my many clocks one day and added the chimes of Big Ben to it. Whenever I would visit my grandparents growing up, I would hear their clock that struck the Windsor Chimes and I always thought that would be a fun project.
This was fairly straightforward, I grabbed some sound files from the UK Parliament website and one other source for the 45 minute chime, and did a little editing. Work done implemented via CRON in a couple of hours, fast forward on to other things.
A few months later and I am on the phone with my mother and she hears the chimes in the background. She starts reminiscing about the sounds and her parents clock and I agree to make something for her.
This video documents the major elements of the build but here’s the parts list:
I had all the sound files to go on from my build into my exciting digital clock, so no additional work done there. One tricky bit was to get the hourly chime to trigger at about 59:40 after the hour so the big ben bell would start striking the hour right at the top of the minute. Since CRON works on minutes, I solved that by making a 59 second file. So the file starts at 59 after but plays a silent section for the first 40 seconds before the chime.
How the hourly Big Ben bell plays: CRON is programmed at xx:59 to trigger a shell script that first plays the chimes, this is the file mentioned above. It then triggers the Big Ben bell sound, and loops the appropriate number of times for each hour. Here’s an example of the code for 9 o’clock. There are 12 files, 1 for each hour.
A couple of new skills for me were achieved on this project. The first was working with JavaScript clock elements for an analog clock. This came together by adding the face of the Great Clock as a background image, editing the photo for size and removing the hands from the face. I then found some similar looking clock hands and did a JavaScript analog clock overlay via HTML. Adjusting the pivot points for the hands took some time, they would drift around the clock face until set just right.
The other element to this was hardening it so it was hands off for mom. With her being 1,000 miles away, I couldn’t do a local install so it had to be right. I had her send me her WiFi info so I could pre-program it on the card. I chose USB powered speakers with an on-cord volume control so she could just lift the touch screen off the case to adjust. Also added a “kill switch” to the back for easy shut down. Finally I included a backup USB card in the case incase the current one is corrupted and I keep an image on my NAS as well if needed.
I did not put a RTC in the Pi. Partially because some of the GPIO ports I wanted we used by the Touch Screen and partly because I had the clock programmed to get NTP time via WiFi so there would be no updating needed.
The Hardware Build
I started with the standard elements I knew the Raspberry Pi 3B+. I chose the B+ because I didn’t need the horsepower of a Pi 4 for a basic display and I had one I had recently swapped out for a Pi 4 on another project. I used the 16 GB Class 10 MicroSD cards in all my Pi projects. They rarely corrupt for me when powered correctly, they offer enough space to power most projects I do, and the are small enough to back up on my NAS without completely killing storage.
I’ve used the Pi Touch Screen in a couple of other projects and it’s very easy to set up and control the display natively. In most cases I also use a commercial Pi Touch Screen stand however in this case I wanted to hide the electronics and let the clock be the focal point.
I tried to build a simple box that would hold the Pi, Screen and Speakers and I accomplished it, but I might do it differently in the future. I assembled the 4 structural elements first, the 2 sides, back and the bottom. Small birch strips held the front out from the back of the box to provide a little extra room.
On the first attempt, I made the face frame from a single piece of plywood cut in 2, so I could notch out the hole to mount the touch screen. I wasn’t really happy with the fit or the structural integrity of that, so I started with another single piece, made a small slat through which I could cut a hole for the screen with my band saw and then used putty to seal the small gap, which worked much better.
Several other holes in the box to allow for air flow, speaker audio to escape and power. I was going to put some grommets on the rough wooden holes I cut in the back but I had to give that up for time so I could get it to Mom by Christmas.
Great news is that it arrived on time and worked perfectly. We plugged it in about 10 minutes to one and by 12:59 it had synced up with the NTP server for a real time update and was playing it’s chimes.
Before it comes up…
I intentionally have not packaged this all up as a GitHub project or some other repository. I don’t own the rights to all the photos or sound files. Hopefully your build will use all the open source stuff!
Other questions on my build? Contact me on Social Media…
I was not paid in any way for this build or post. Some of the links in this post lead to shopping sites, however I make no commission. If this post helped or inspired you, consider dropping something in my tip jar.