
How I Installed it
Pulling together some instructions from a couple of sources, here’s how I did the installation.
Clean the current version
It’s always a good practice to start with the latest and greatest version of software. I keep a base image of Raspbian Buster configured with wifi etc to make it easier to start a project, but I still need to get the latest updates. Here’s what to run:
sudo apt-get update
sudo apt-get full-upgrade
sudo apt auto-remove
This will get you updated to the latest version of the distro and remove what ever clutter is leftover. Once you have that running, you want to disable NTP if it’s installed.
sudo systemctl disable ntp
It’s also helpful to configure your local time zone at this point. I use the “raspi-config” tool.
sudo raspi-config
Time Zone is set under “Localisation Options.”
Install GPS Module
I have a GeekStory GT-U7 GPS Receiver that I picked up from Amazon (photo above). I am using the GPIO Serial connection in order to pass PPS data to the Pi. PPS is “pulse per second” data which provides millisecond (10(-6)) or better time synchronization. I use pinout.xyz as a guide to connecting the GPS. It does require some basic soldering but it’s only 5 wires.

Let’s get started on the software install. This batch of programs will set up the GPS support.
sudo apt-get install gpsd gpsd-clients python-gps pps-tools
There are some configuration file changes that also need to be made to support the GPS on GPIO port. Add these to the end of /boot/config.txt.
#GPS Changes
enable_uart=1
#Disable Bluetooth so serial-tty speed is no longer tied to CPU speed
dtoverlay=pi3-disable-bt
#Get 1PPS from HAT pin
dtoverlay=pps-gpio,gpiopin=4
The next boot file we have to change is /boot/cmdline.txt. All the data in this file needs to remain in a single line, but you want to remove this section.
console=serial0,115200
Once you have the GPS software installed, reboot and make sure that is working by using some of the GPS tools.
gpsmon /dev/ttyAMA0
shows the GPS information and you should see data streaming below the table. Give 20 minutes to get your first fix after installation while GPS downloads the latest info from the satellites and you need to be able to see at least 3 sats to get a fix.
On additional step, we need to tell the GPSD system to output data so the time service can pick it up. To do this we’ll edit the config file.
sudo nano /etc/default/gpsd
There are 2 changes I have made to the file. We’re hard-coding the GPS device location, insuring it runs immediately. Here’s the two key lines in my file:
#Devices gpsd should collect to at boot time.
#They need to be read/writeable, either by user gpsd or the group dialout.
DEVICES="/dev/ttyAMA0"
#Other options you want to pass to gpsd
GPSD_OPTIONS="-n"
Unlike some other Stratum 1 server configurations, Chrony depends on GPSD running in order to pass data to the clock. At the command line, enter this to get the system to start GPSD at boot:
sudo systemctl enable gpsd
Let’s check and make sure things are running as planned. After rebooting run “gpsmon” (without the additional device information used earlier) to check and make sure the GPS is getting data to the system properly and that you have a fix. Then use “ppstest” to make sure your feeding the pulse-per-second data to the clock. It will look something like this:
$sudo ppstest /dev/pps0

trying PPS source "/dev/pps0"
found PPS source "/dev/pps0"
ok, found 1 source(s), now start fetching data…
source 0 - assert 1586809343.326614834, sequence: 3434 - clear 0.000000000, sequence: 0
source 0 - assert 1586809344.326620876, sequence: 3435 - clear 0.000000000, sequence: 0
source 0 - assert 1586809345.326628115, sequence: 3436 - clear 0.000000000, sequence: 0
If that works as expected, you’re ready to move on to Chrony. Now might be a good time to backup your SD card in case you want to use this for something else down the road.
Install Crony
According to the documentation at the gpsd.gitlab.io How To page, here’s the configuration:
sudo apt-get install chrony
sudo nano /etc/chrony/chrony.conf
The chrony.conf file will tell the time server where to connect for it’s time information. We want Chrony to default to the GPS stream since that is a master (Stratum 0) time server. I configured the Chrony.conf file with the following server info.
server 10.0.1.200 iburst
server 10.0.1.208 iburst
server 10.0.1.220 iburst
pool 0.us.pool.ntp.org iburst
refclock SHM 0 poll 3 refid GPS
refclock PPS /dev/pps0 refid PPS lock GPS

#Allow Chrony to provide time to LAN
allow 10.0.1.0/24
The first 2 servers are two NTPSEC time servers on my LAN. The 3rd is a parallel Chrony installation I am creating. The pool group will check time against other NTP servers online. The refclock lines tells the time server to get data from the GPS and not to use the PPS data until the GPS data is locked.
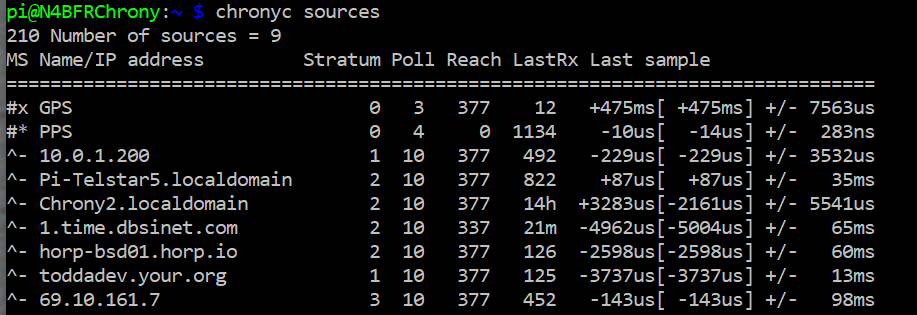
Once I rebooted and checked the GPS had a lock, I checked my Chrony performance using the command: “chronyc sources”. The * next to PPS tells you that the accurate PPS signal is the chosen source.
Some additional commands you may find helpful before you go searching for the documentation:
- “chronyc tracking” shows you lots of nice details about how the clock is synchronizing.
- “sudo chronyc makestep” forces your system clock to immediately sync with the Chrony time. Chrony will try and smooth the time change if you don’t use this.
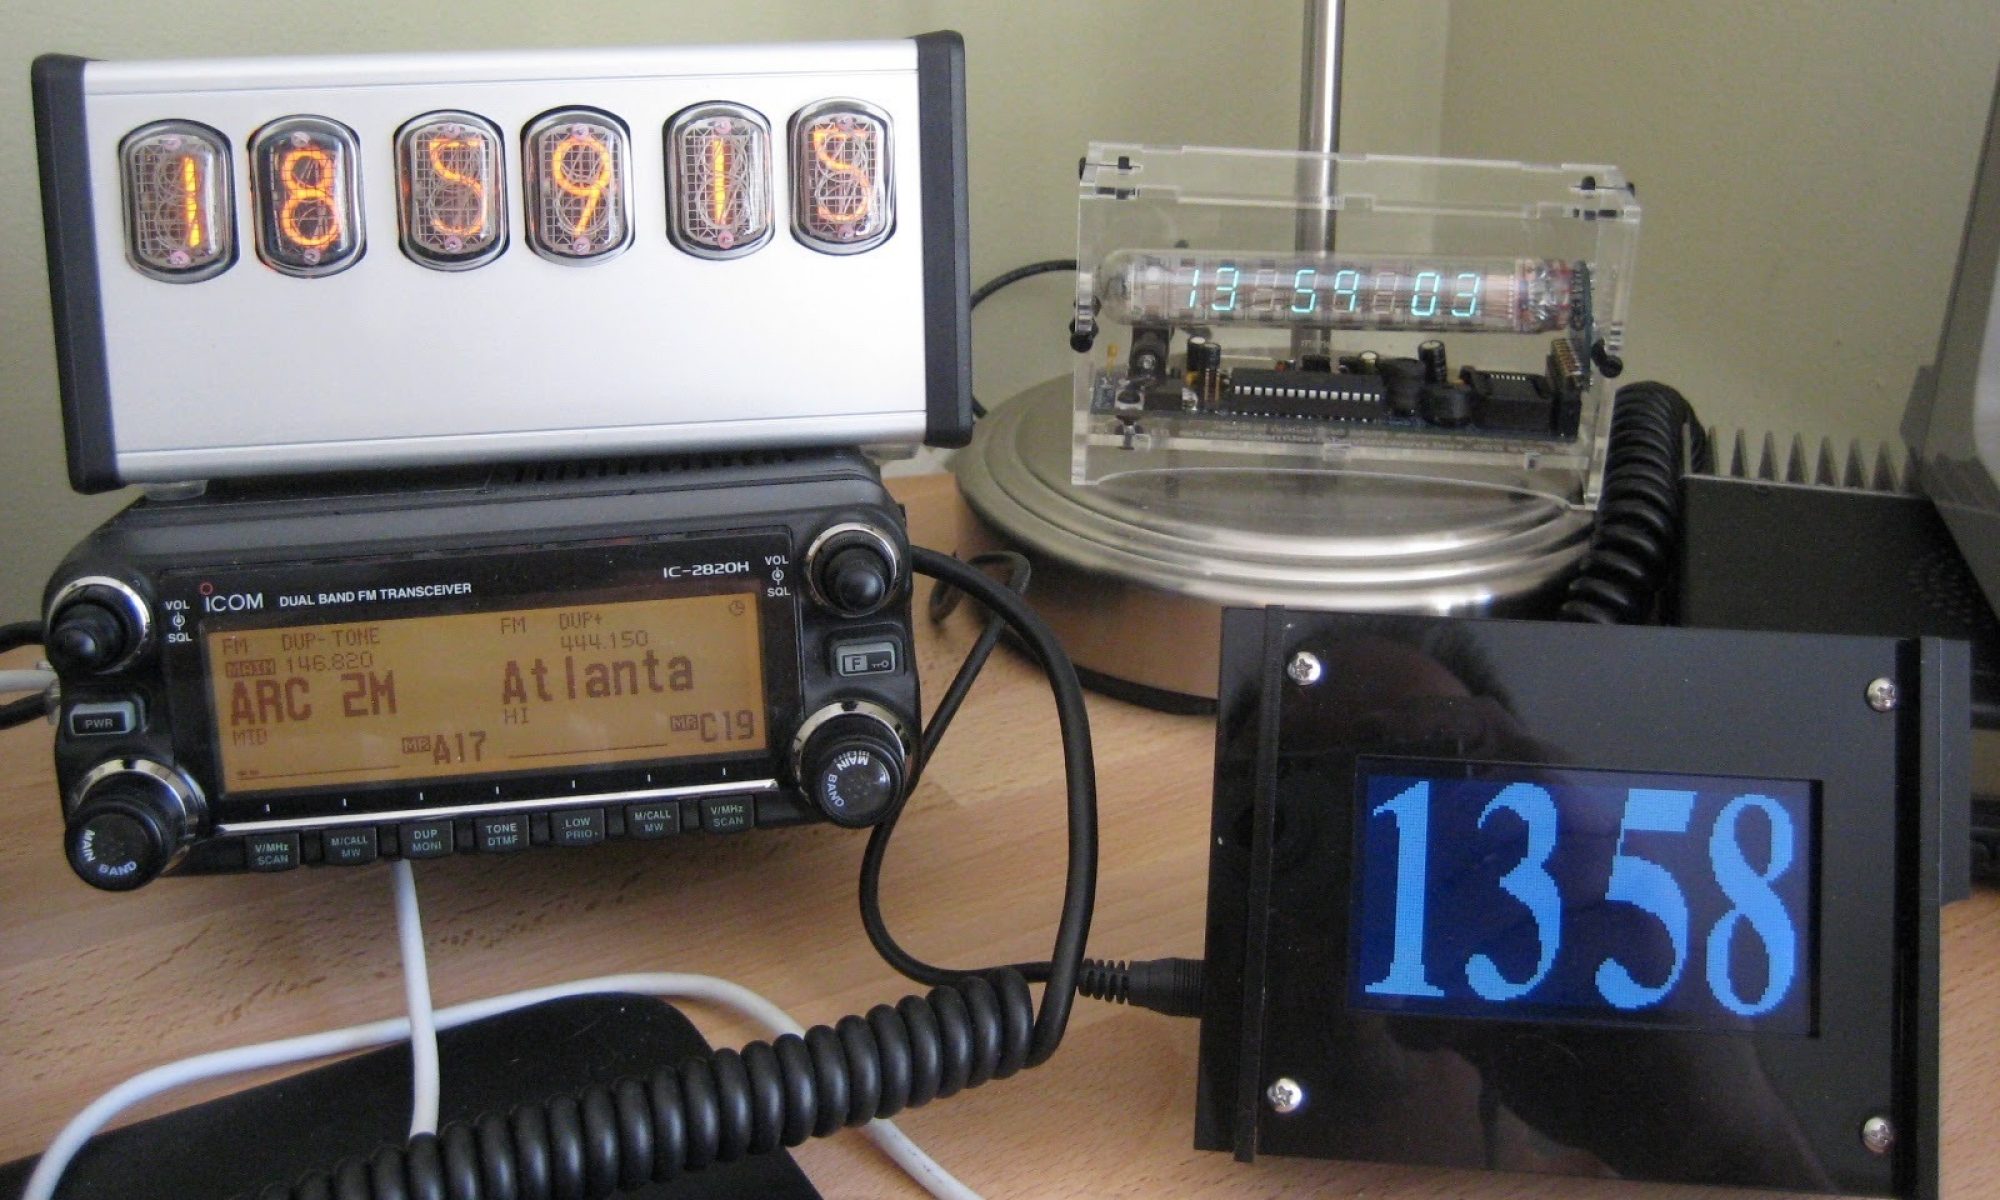
Good luck on your build! While I was building that clock, I found some spare parts from an old clock build, so I set up a second that will be a stand-alone clock. Still needs some configuration and Python programming, so more to come on this one, but here’s a teaser.